Showing posts with label tutorial. Show all posts

Monday, January 5, 2015

Happy New Year and a Tutorial

Happy New Year to all!!!

I hope you had a very good celebration of New Year. I had fun particularly, in taking photos of the fireworks from our neighbor. Yup. My neighbors and big fans of fireworks and firecrackers although my sweet daughter isn't. She stayed inside the house with an ear plug and ear muffs.

A few weeks ago I did some research on how to capture a really good pictures of fireworks. I found a couple of websites from pinterest. Here are a couple of my pictures:


There are works in progress, I have to do this again next January. Although I found a lot of recommended camera settings, this one is my fave:

ISO - 100
Aperture - f/8 or f/11
SS - 1/2

The things you have to remember in photographing fireworks are:
1. You need a tripod. Since this is a long exposure photographs, having a steady place and holder for your came is important.
2. Find a good place to photograph fireworks. See mine? I didn't have the right place actually. I was so engrossed at looking at the fireworks that these photos were just "oh yeah I should take a picture of that" thing.
3. Shutter remote is optional but having one would be great.
4. Practice makes perfect. I'm gonna do this next January for perfection :)


We also tried doing the letters using sparklers, but they're blurry and the background isn't neat so I'm gonna skip posting that one, but I'll make sure to include them next time :)

 photo dec2014siggy_zpsf33d567c.png

Tuesday, January 22, 2013

Project Life 365 And Some Great Tips I've Collected From The Web

How is every body doing so far with their Project Life or Project 52/365? So far I'm in my fourth week now. I took these photos using my iphone. Yeah I know, I'm so lazy picking up my camera. I blame it on my computer. I'm still not used to my desktop. And I still have this weird feeling about my ehd. I think it might fail me again :( Well anyway, my iphone is very handy after all. And I can camouflage and pretend that I'm not taking photos of my kid, strangers, food at the diners etc. Tee hee!!

As I surfed the world wide web, I found a lot of tips and tricks on how to complete your Project with pride and less stress. I trimmed them down into 5 points. This might work for you.

1. There will be days when you might NOT have photos taken. Yep, that's the reality. You can use an alternative. Like journaling with no photos at all. Those that are used to their camera like me with get tired (too) of bringing their heavy equipment with them, use your phone.

2. You might skip some months, continue when you're ready. Yep, I've ready (I think) 4 blogs whose authors had this kind of skip problem. They say that it mostly happen when you're just starting. That might really happen to me and I have to ready myself :)

3. If one page is not enough, use a second page or a third page. Hey I love to tell a lot of stories that my daughter would want to hear or read someday about how we conquer this day.

4. Search the web for freebies. One blog author says that you don't need to buy all the Becky Higgins stuff, you can find free stuff just search on the internet and choose what's going to fit on your page.

5. You can use a support group. Include your family in the process of your project so they know what you are doing and they can even help remind you to take photos or finish your page :) This is my favorite part :) There's also an advice about joining a group of people doing the Project. I joined Project Life Support group on Facebook and I regularly read the Project Life 365 on Facebook too.

And I also use a couple of applications on my phone. I find them very useful.

1. Awesome Note (iphone app - free)
It's an all in one organizer from your to-do list to shopping and event checklist, calendar and daily journal. What I like about this one is that it is the same with my journal except that this one's on my phone :)

2. Evernote (iphone app - free)
I have this on my laptop, I have this on my desktop and I now have it on my phone. You can open this anywhere and anytime. Great for copy+paste of your documents, journaling, layouts from your desktop or laptop.

3. Collect: Photo A Day (iphone app - free)
There's a paid version of this called Day 1. I'm so tempted to buy it but I think this one is useful as the other one. It's an application for those collecting photos a day. You click on the date, add a photo, your caption or title and the detailed notes or journaling. You can also tag your photos.

4. QR Reader (iphone app - free)
There are TONS of QR reader in the application store for free. You just have to find what's right for you. What's this for? An additional instrument to rock your Project pages girls! You've seen a lot of pages with text messages scanned and added to their pages, why not include a video of your kids or husband, that's memorable you want them to check someday. Thanks to the genius minds!! :) I've included a QR Code on one of my page, it's the 'concert' of my 2 1/2 year old daughter. And I love how it looks.

I hope you learned something on this post. Happy scrapping with your Project!!

Friday, October 19, 2012

Saving A PSD File in TIFF Format

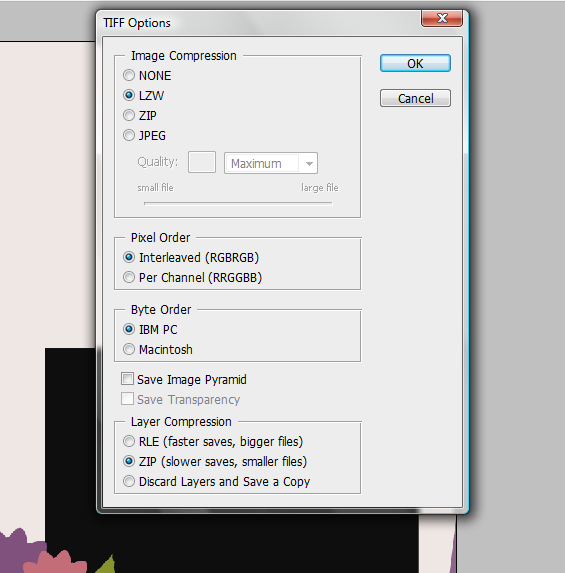
I have a tutorial for today about saving a TIFF file. When I was just beginning to make my own templates, I used to save TIFF files larger than the PSD file's size. Then I read something about what a TIFF format is online. Where it says that other people are saving this kind of format for a smaller size. It can be that other scrappers prefer this type of file to save space on their computer. It's very easy to memorize actually. And in this tutorial I used Photoshop CS3. Once you opened your PSD file, click on the file menu and choose save as. Then on the pop up window choose on the scroll down menu - TIFF.  Once the TIFF option pop up window opens, just click on the following buttons so they will highlight, and then click OK. This option will automatically save the choices you clicked for the next time you will want to save another file on TIFF format.


Here's a sample of the size of the template I made in TIFF format.


See? It's just 823 kb in 300 ppi 12x12. Pretty cool huh? So go ahead and try it yourself. Happy scrapping!!
Monday, June 18, 2012

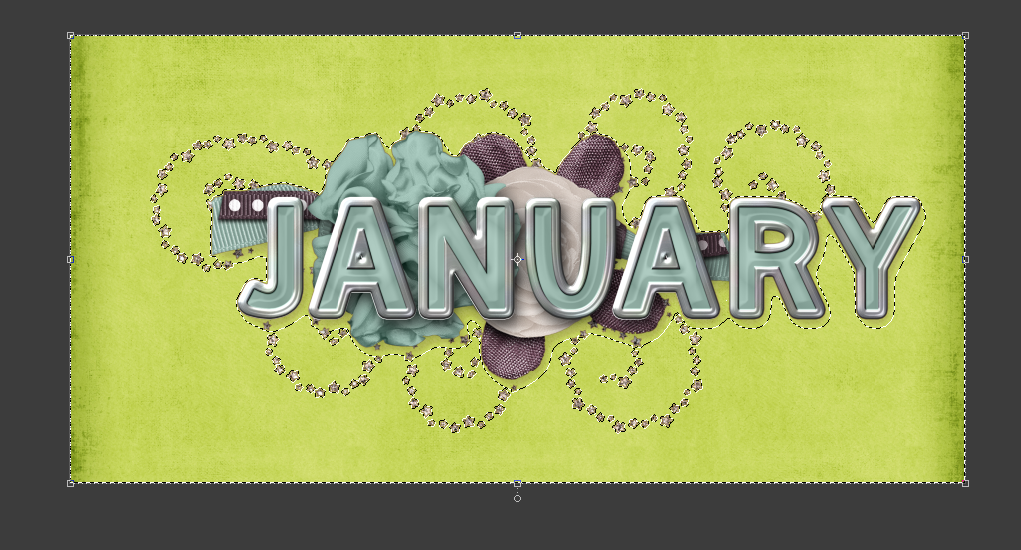
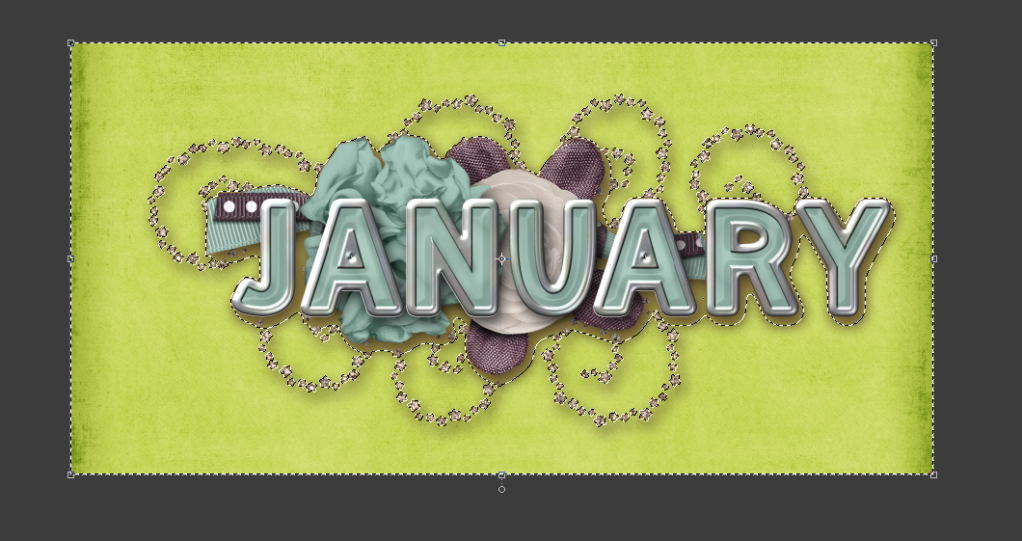
Applying Shadow On A Translucent Element

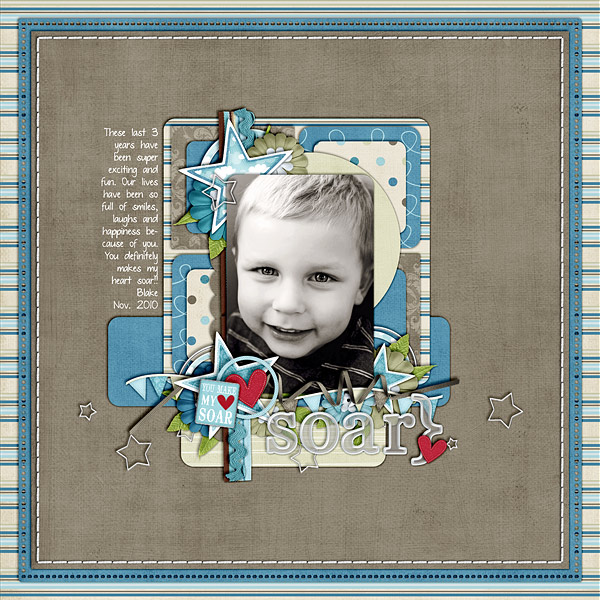
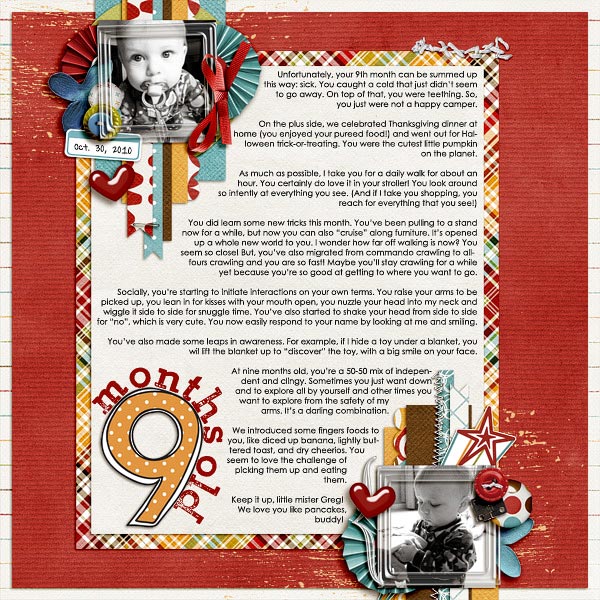
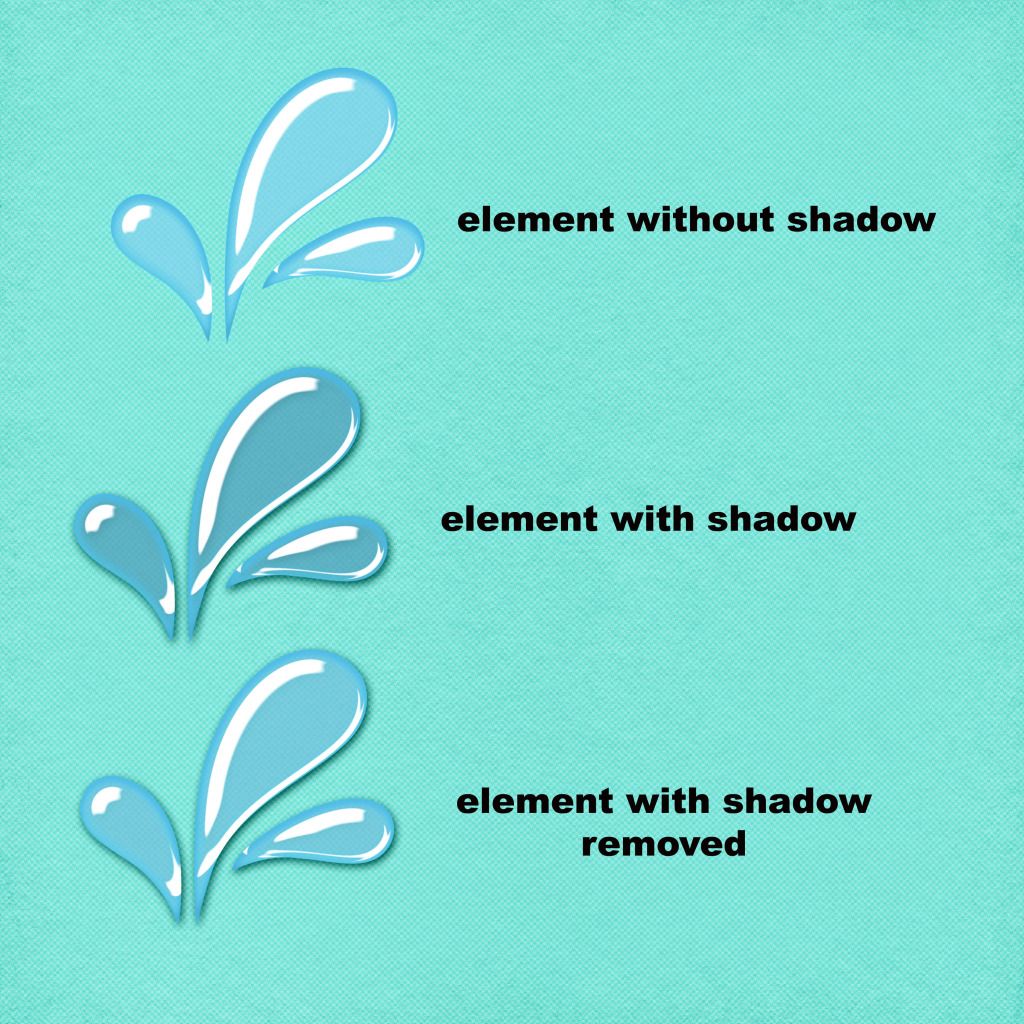
Hey there! I've got a new tutorial for us all. Most of the time that I'm gallery hopping, I'm seeing a some layouts wherein their shadowing on translucent elements like bubbles, water splash and alpha, were fantastically applied. Here are some examples:



So how did they do that? Let's try these steps.
1. For this tutorial, I used my PS CS3. Open your program, the element and the background paper.

2. Apply a shadow on your element.

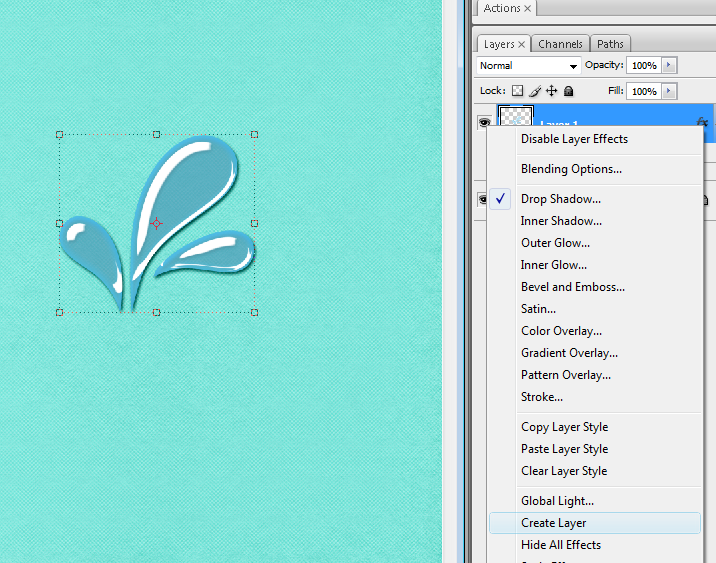
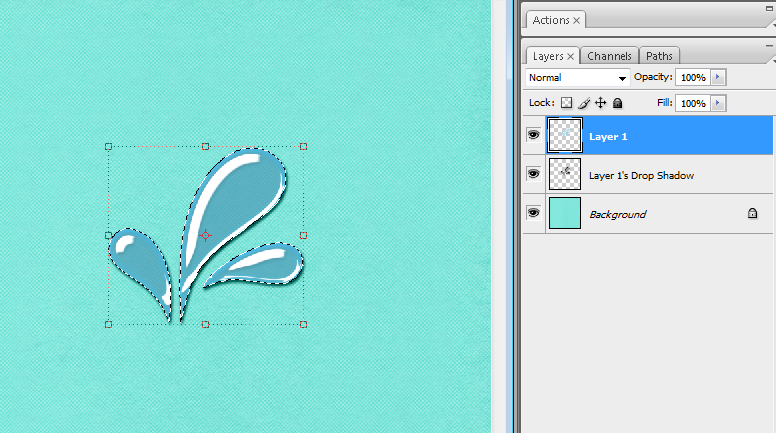
3. Now right click on the drop shadow icon and choose create layer.

4. Don't panic when the drop shadow icon disappear. That's how it will be. Now, click on the element icon (as for my example, it is named layer 1) and you will see the marching ants around it. now highlight the element's drop shadow and hit delete. You will now see that the shadow on the translucent element has disappear. The only shadow you will see now is the outside shadow.

See the difference?

Here's a closer look at the element and its shadow:

Try it for yourself and master it. I hope you learned something today. Happy Scrapping!


Friday, June 15, 2012

Deep Knockout Tutorial And A Freebie

Thank God It's Friday! How's everybody doing? i'm working on installing my photoshops and actions on my laptop. Thank God that I was able to save some on my external hard drive. And yes, like many other scrappers, I would suggest too, that you have a backup of your files on an external hard drive or cd/dvd so that when things go wrong on your pc or laptop, you can just re install everything.

Anyway, here's a tutorial I made a long time ago that will be useful for those on CTs and/or scrapbook business. It's called the Knockout Tutorial. Have you ever wondered how to make a quickpage with a black photo section with shadows? Here is the answer if you don't know yet.

(This tutorial is if you're in the process of converting your layout into quickpage)
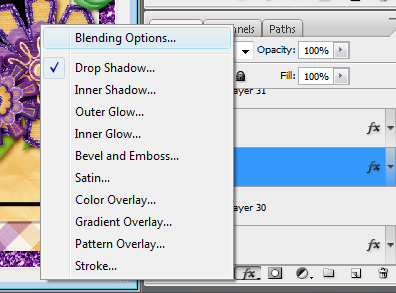
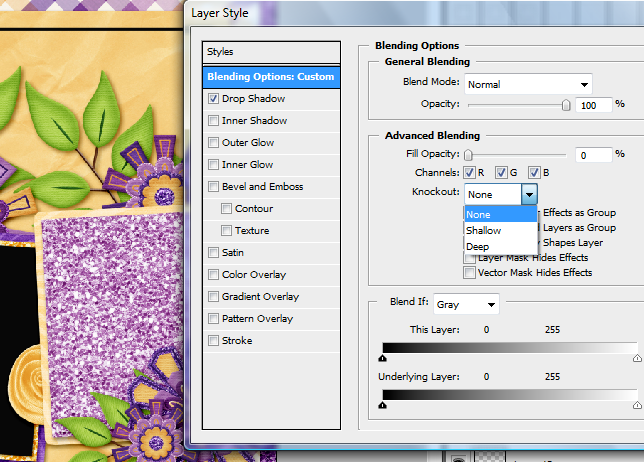
1. You can remove you photo/s if you have a photo mat or just let it stay there if you don't use one. While the photo/photo mat is highlighted, click on the layer style button and choose blending option.

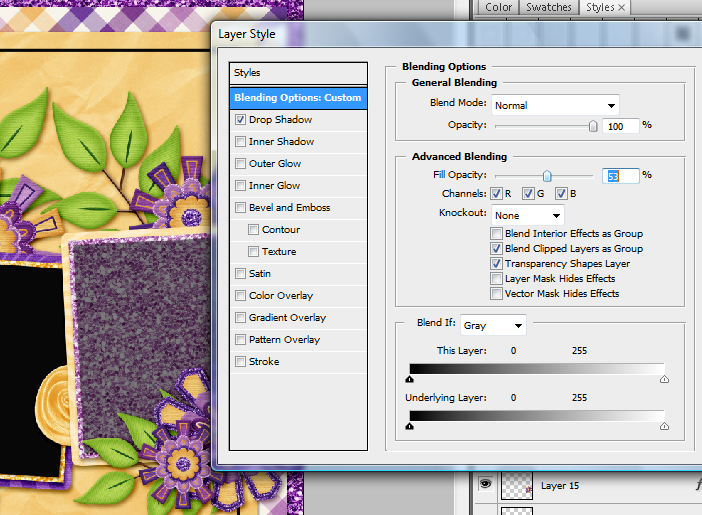
2. Change the Fill Opacity Percentage to 0. See how the photo mat is becoming invisible?

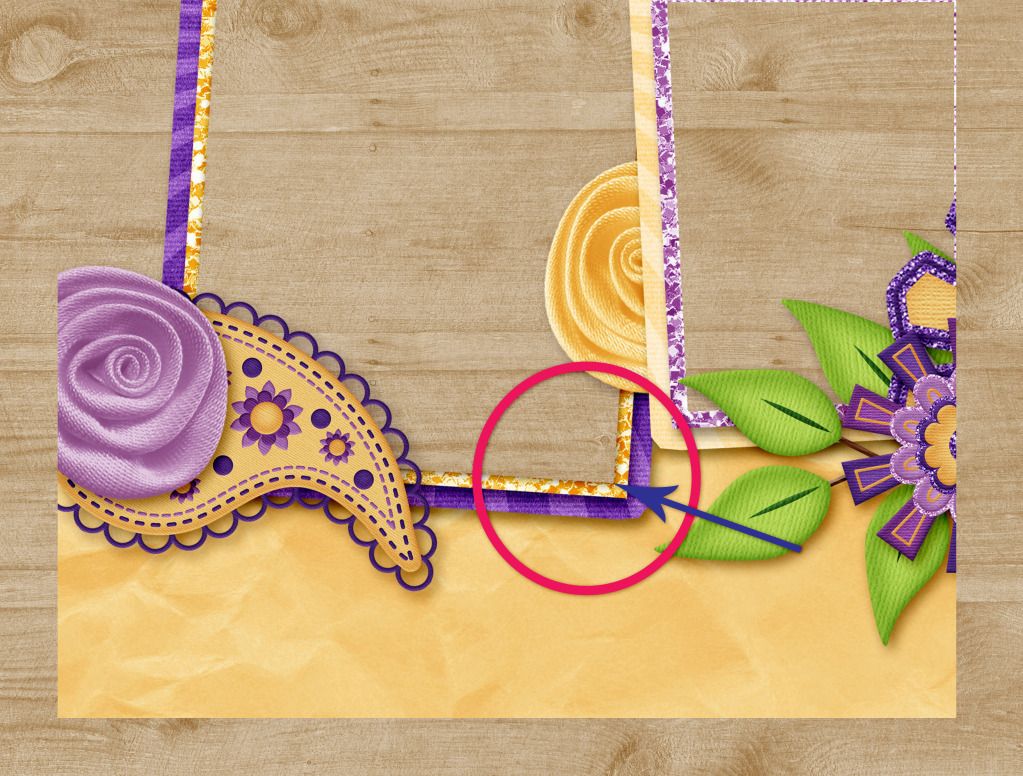
3. Change the Knockout from none to Deep.

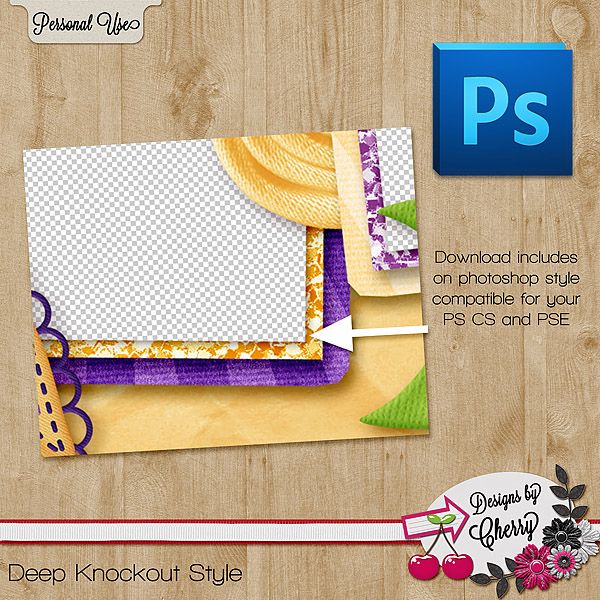
4. Here's a preview of what happened after the process.

And I have recorded this action and you can download it here.


Wednesday, April 11, 2012

Coloring A Doodle Tutorial.

Hello!! I have posted a tutorial about Coloring A Doodle over at Scrapping Fairytales blog. If you want to learn how to, head over there and read my post *wink*

Wednesday, March 28, 2012

Writing Text Using A Text Path

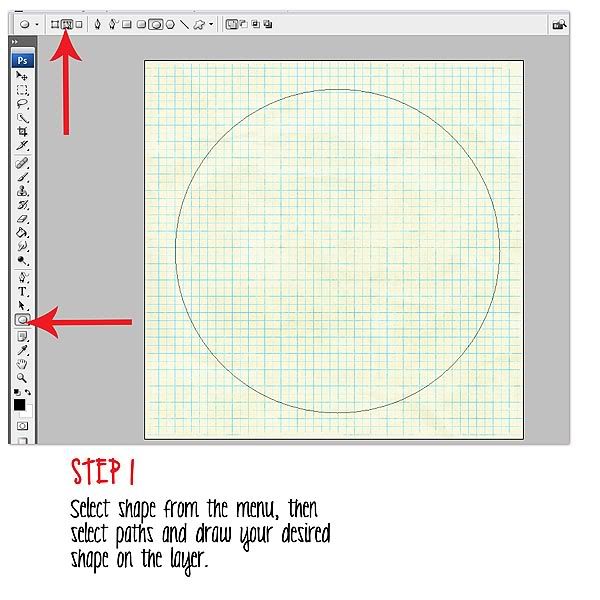
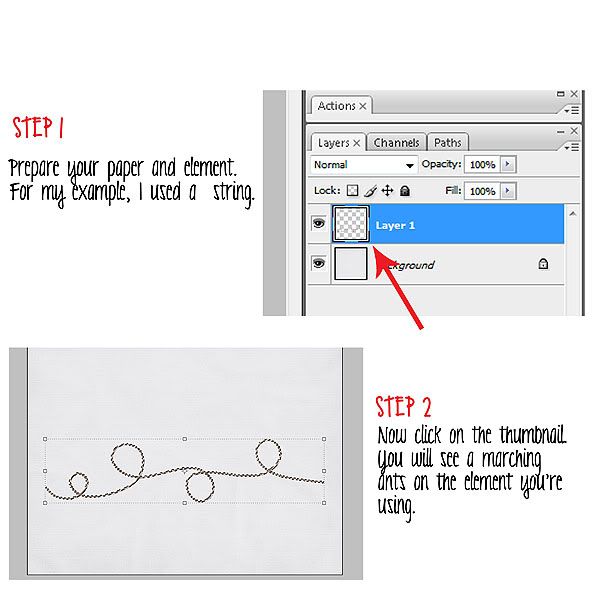
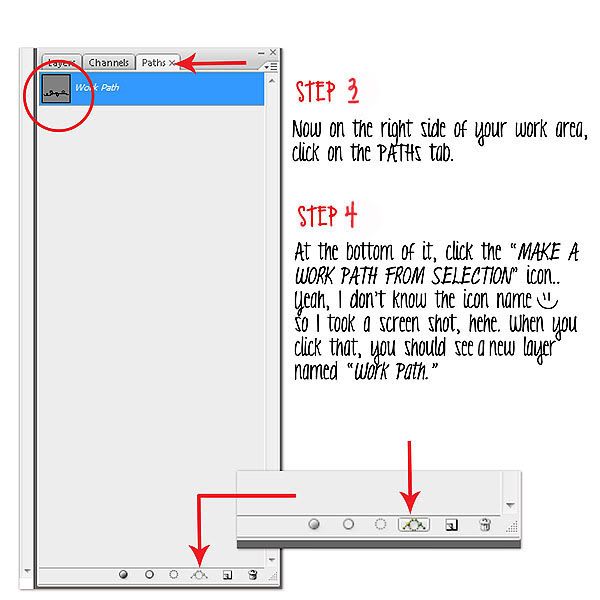
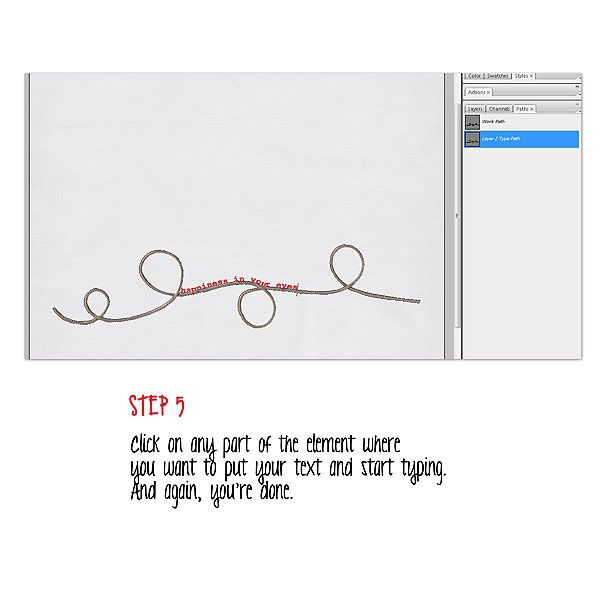
I first posted this tutorial over at Simple Girl Scraps' blog. But I wish to post it here as well with an additional tutorial. Let me do this in pictures :) By the way, I'm using CS3 for this tutorial.


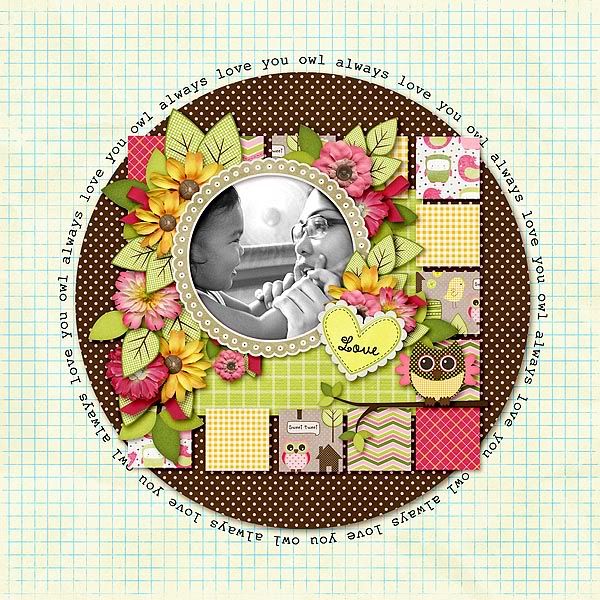
And here's my layout:
School Rules Paper (base layer)
Owl Be Home kit both by Simple Girl Scraps

But it will be a different story if you want to use an element to write your text on. So, here are the steps.


And here's my layout:
Whimsical World by Simple Girl Scraps

Easy peasy? Now you can try it on your own :) Hope that helps. Happy scrapping!!

Monday, February 27, 2012

When MOJO Is Missing

Have you ever had a week or a month when your Mojo is missing and can't be found anywhere? I do too. And it's really not good at all especially when I have 3 or 4 kits/layouts due soon. So what do I do? Here's my technique:

1. Hang Out In The Gallery.
I brows on some galleries for inspiration. It's so good to see beautiful layouts in the gallery, helps you get inspired. You can scraplift and/or mix and match some layouts.

2. Join Some Forum Challenges
There are a lot of forums that has challenges like Progressive Scrap Challenge @ Scrapping Fairytales, Scraplift Challenge @ Polka Dot Plum, Template Challenge@ Scrap Matters and many other. This will help you get going.

3. Brows Some Magazines
When I was still paper scrapping, I buy a couple of scrapbooking magazines ever now and then. And now that I'm already hooked in digital scrapping, I still brows those magazines, they help me be inspired when all else fails *hehe*

So, these are some of the techniques that works for me. You might have your own techniques and would like to share, I'd be happy to read it on your blog in the comment section :) Thank you and have a nice day!!

Created using Oh! Snap! by Thaty Borges

Monday, February 6, 2012

How To Remove Shadows on Pre-Shadowed PNGs

Hi there! I'm here for a tutorial today. I learned this tutorial a long time ago but I don't think that I'm practicing this or applying this of some freebies that I do. I was just reminded of this last week when I was browsing on a forum. Have you ever come across a freebie or one that you made, let's say a cluster, that you think the shadowing was too much for your taste? This tutorial can actually help you. Here are the step by step procedure:

1. Open the cluster/element/quickpage on photoshop. If you are making a freebie, you may want to click ctrl+a and ctrl+e so they will become one. For this tutorial I will be using my ps element. I put the cluster on a paper so you can see clearly the shadow.

2. Go to edit, stroke selection and change the width to 3px.

3. Click on the thumbnail. You should see the marching ants around the part where there were shadows.

4. Now click invert or shift+ctrl+i.

5. You can now hit the delete button to remove the shadow a little bit. You can hit the delete button up to 4 times or once you get contented with the removal of the shadow. See how I was able to remove the shadow on parts where it's visible? Now you can go and put the amount of shadow you want :)


Here's an example on a bragbook. Hope you learned something today!


Thursday, August 4, 2011

Alpha For Beginners

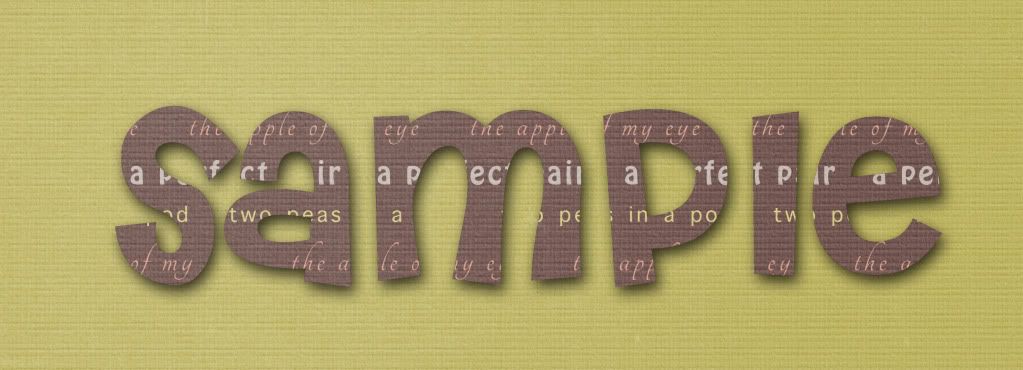
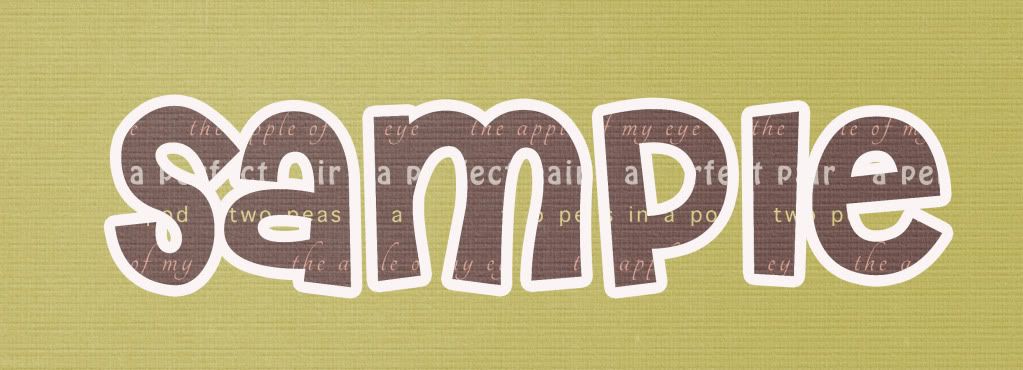
Hey there! I'll be teaching you a simple way of turning a text into alpha. You might be wondering how designers and others do it, so here's my tutorial. for all you beginners.

1. Type
Choose the font that you will use for your layout. Type a word or a letter. As for me I used Cheri from dafont.com.

2. Copy
Copy the text you just typed.

3. Clip
Clip a paper on the top text to add a little texture, so it should look like this:
(I put a shadow on the text so that you will see what it will look like)


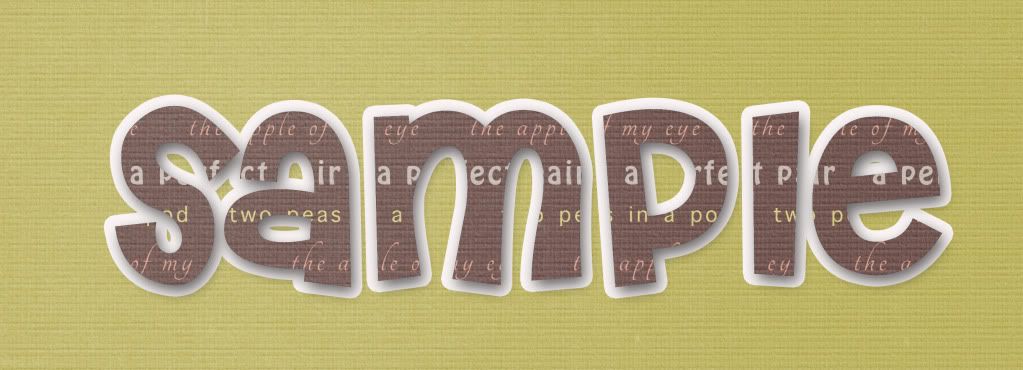
4. Stroke
This is an option if you want to add emphasis or style on your text. Here's what it will look like:


And then just add a slight shadow on the top text so it would much look like an alpha instead of typed text only.


So there you have it. Your very own alpha for beginners. Next time you may want to play around with your photoshop, add a little bevel, play with the shadow and practice stroking.

ALL TEXT AND IMAGES ON THIS BLOG ARE PROPERTY OF MY LIFE ON SCRAPBOOKS UNLESS OTHERWISE STATED. DISCLAIMER: AS A MEMBER OF THE FOLLOWING CREATIVE TEAMS, I RECEIVE PRODUCTS FOR FREE IN RETURN FOR CREATING AND POSTING PROJECTS TO PROMOTE THEIR PRODUCTS. THANKS. Header and Siggy created using Showing Thanks by Blue Heart Scraps
Protected by Copyscape Online Plagiarism Detection