
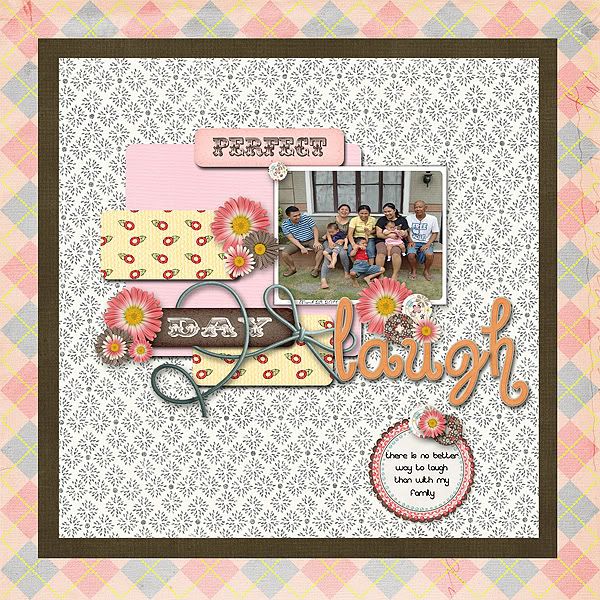
Hey There! Now I wish to post a tutorial about editing your layout BEFORE posting on online galleries. Most (or all) online galleries require us to resize our layouts before posting. And if I'm not mistaken they only require it to be on 72 in resolution and 600x600 pixel. Now take a look at this example. This is already resized and edited.
Here are the steps.
1. open your layout.

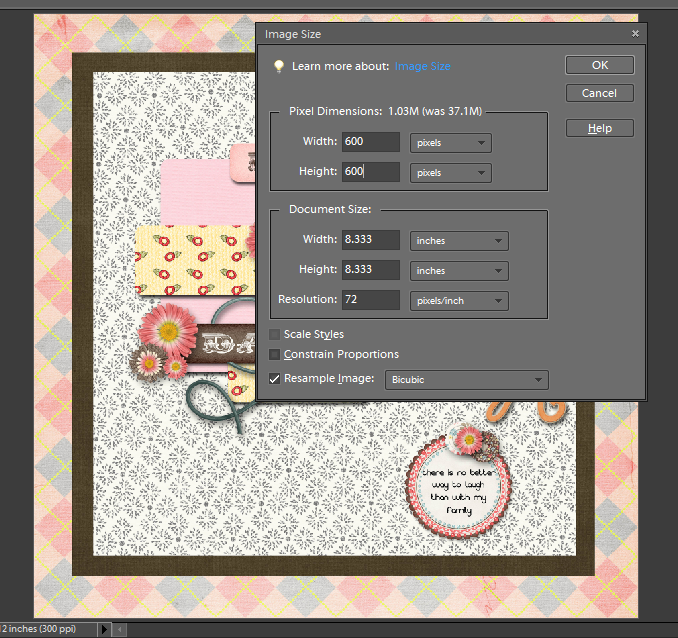
2. Re-size your layout to 72 res and 600x600 px.
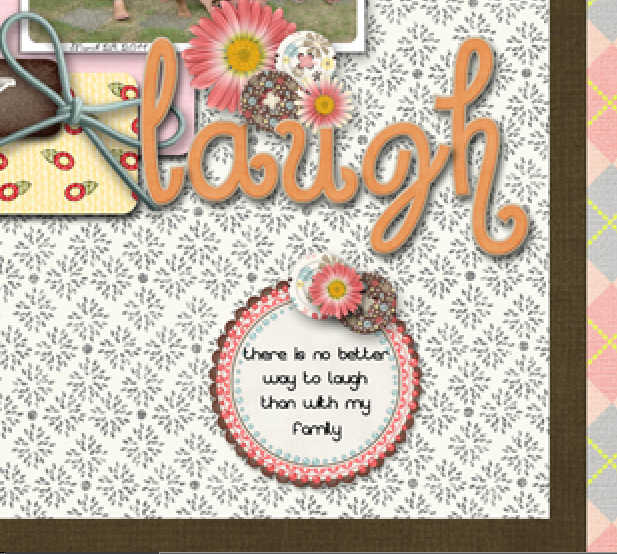
3. When you re-size an image, it looses most of it's attributes and will be fuzzy and you will know that by zooming the image a little.
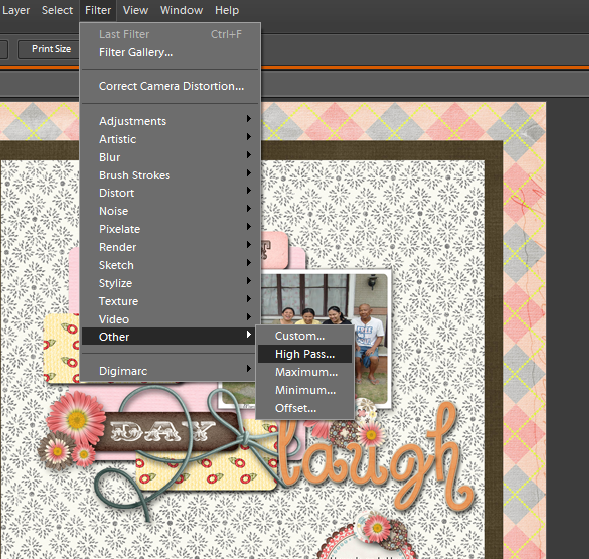
4. The next step is to duplicate your layer. Go to Layer-Duplicate Layer or simply press Ctrl+J (Command+J on Mac). Now we are going to sharpen the image. Click on the duplicate layer and go to Filter-Other-High Pass.
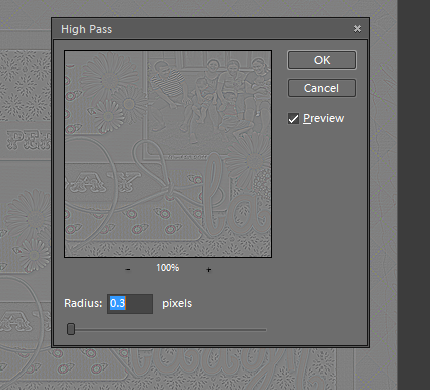
5. Now you have to reduce the Radius to 0.3 pixel and it should look like this:
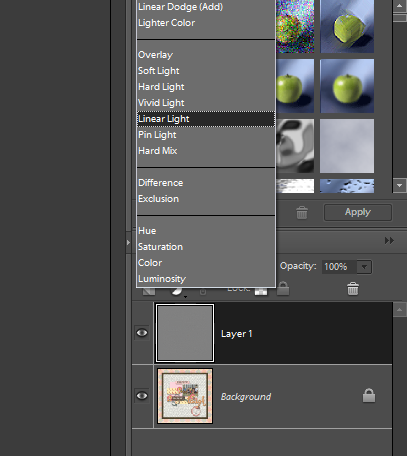
6. Now still on the highlighted duplicate layer, click the Blending Mode and choose Linear Light. This will make your layout visible again.
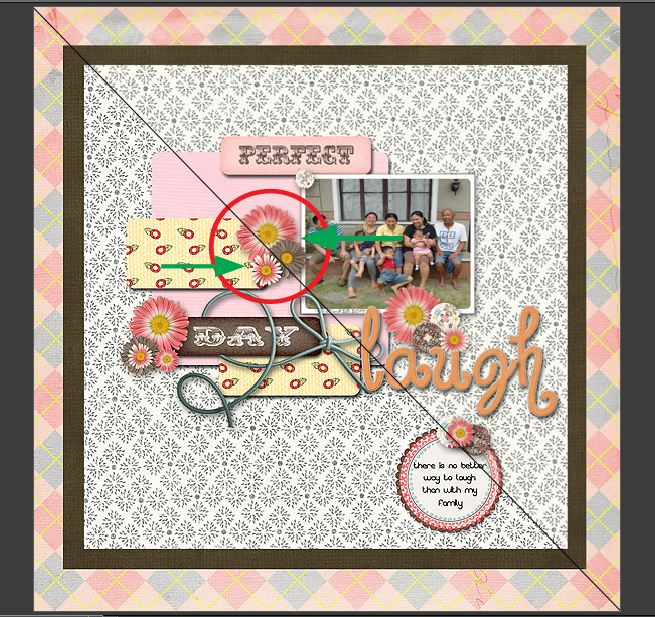
7. But notice the difference between the one I edited and the one I didn't (both were resized). See how crispy the bottom one was? It's crispier and the elements are more detailed. Now that will pass for your web posting.

No comments:
Post a Comment